
An e-commerce website needs user interaction tracking like no other. Knowing your transactions, traffic sources, cart abandonment, and much more will help you improve your sales and marketing efforts.
An awesome choice for an e-commerce tracking setup is to use Google Tag Manager with Google Analytics, and that’s exactly what we are going to discuss in today’s post. This will continue our series of articles about Google Tag Manager — after our general overview of Google Tag Manager and a summary of GTM best practices, we are now inviting you on a special e-commerce journey with GTM and GA.
Introduction to e-commerce tracking with GTM and Google Analytics
For e-commerce tracking, you will need to set up Google Tag Manager and Google Analytics to work together. They both are extremely powerful tools, each of which has its own mission. When set up in the right way, e-commerce tracking pulls your users’ transaction data into your Google Analytics Report, which allows you to evaluate your marketing results in every detail and see new opportunities.
Standard and enhanced e-commerce in GA
Before we move on to setting up e-commerce tracking, it’s worth describing the types of e-commerce tracking in Google Analytics. There are two of them and their choice depends on the data you want to learn.
- Standard e-commerce. This is basic tracking that gives you information about the transactions such as conversion rate, average order value, time to purchase, total revenue, total taxes, products purchased (name, SKU, category, price, etc.), and more. Standard e-commerce gives you quite enough information and is easier to work with.
- Enhanced e-commerce. With this type of tracking, you will be able to see the steps of the user’s journey in more detail such as visiting the product category page, viewing promotions, adding products to the cart, abandoning the cart, changing products in the cart, choosing the payment method, checking out, completing the purchase, and so on. Enhanced e-commerce tracking gives you more information but also requires you to be more tech-savvy to set it up and interpret its results.
Steps to set up e-commerce tracking with GTM and GA
It all comes down to three main steps in the transaction tracking setup:
- Preparing Google Analytics to receive transaction data (enabling e-commerce in GA)
- Setting up the data layer for your transaction data so it is consumed by GTM
- Instructing Google Tag Manager to push the successful transaction data to GA
1) Enabling e-commerce in Google Analytics
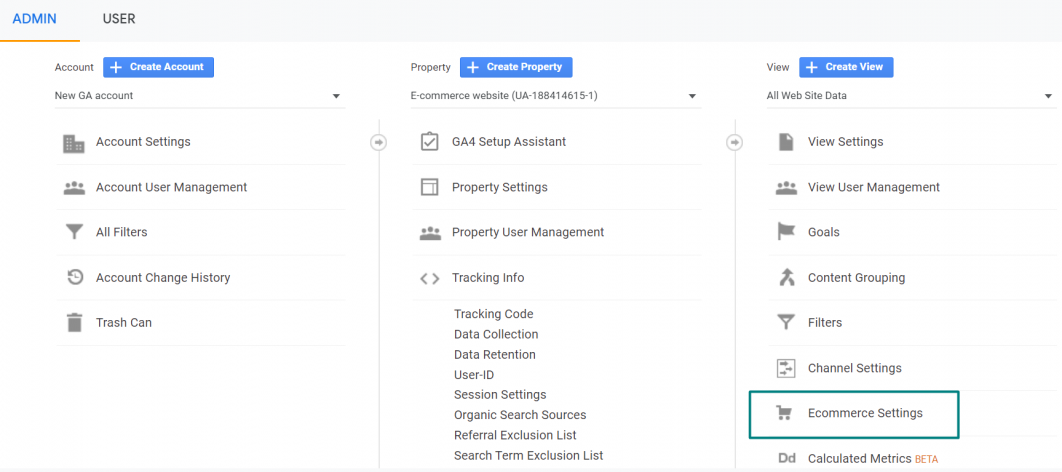
First, you need to prepare Google Analytics to receive the transaction tracking data. It all begins with going to your Google Analytics account. We assume you already have it set up and your GA property created (a property in Google Analytics is actually your website added there). In your GA account, find the Admin section, select your property, and click “Ecommerce settings” in its View section. The hierarchical structure is Admin > Property > View.
NB. If you do not have this option, or no property yet, make sure that during your GA property creation you click the “Show advanced options” button, then check “Create a Universal Analytics property” and “Create a Universal Analytics property only.”
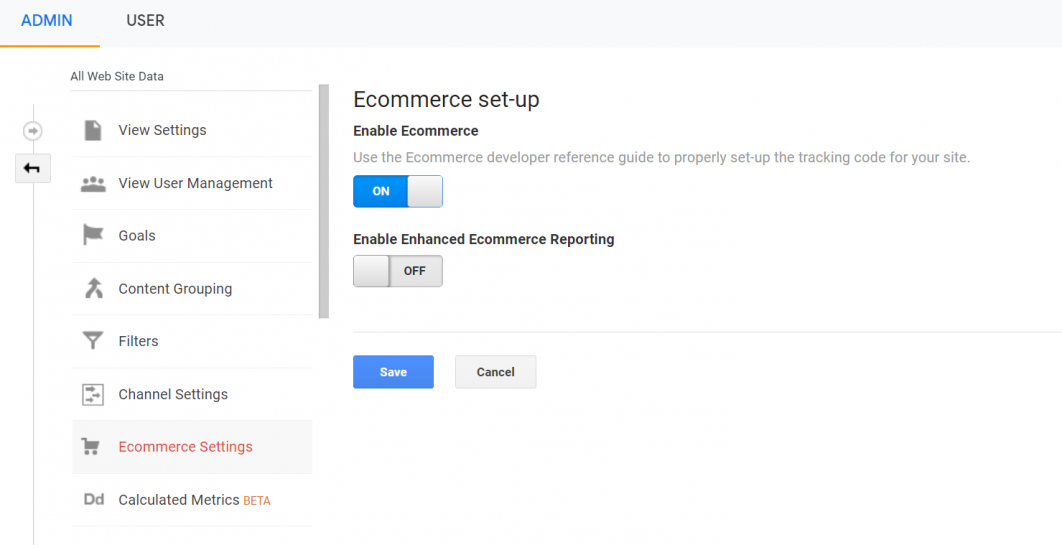
Next, you will need to enable e-commerce by clicking the toggle button. You can also enable enhanced e-commerce reporting that we have discussed above. It’s your choice whether to enable it or stay with the standard functionality. Our guide will mostly concentrate on standard e-commerce tracking.
2) Creating an e-commerce data layer for GTM
As we discussed in our previous blog post, one of the best practices to using GTM is putting important data in the data layer, which is actually a JavaScript code snippet storing specific data.
<script>
dataLayer = [];
</script>
It is added to the code of web pages above the Google Tag Manager container. The data is read by Google Tag Manager and used in tags, variables, and triggers, and telling GTM when to activate tags. Here is the GTM Developer Guide to working the Google Tag Manager data layer.
When it comes to e-commerce tracking, it’s your online store’s transaction data that needs to be pushed to the GTM data layer using the dataLayer.push() method in order to be further transferred by GTM to Google Analytics reports. The transaction values need to be dynamically placed in the data layer after each transaction. The data layer snippet is placed above the GTM container’s code on your e-commerce website’s transaction pages — in common e-commerce tracking scenarios, these are order confirmation or thank you pages.
It’s a task for a developer to set up the transaction data layer. If you are using e-commerce platforms from specific CMSs (Drupal, WordPress, Joomla, etc.), chances are high that the data layer is set up out-of-the-box or this functionality is available through an add-on plugin. Still, it needs a developer’s oversight and customization.
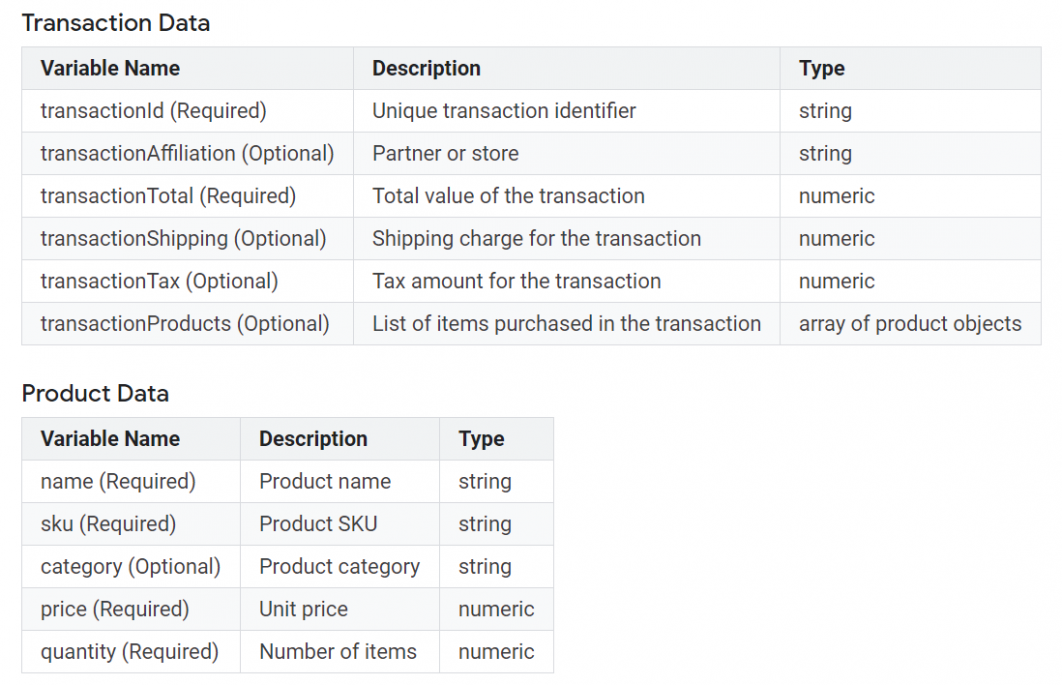
The variables used in the transaction data layer need to exactly follow the naming convention defined by Google (like transactionTotal, transactionTax, transactionProducts, transactionShipping, and so on). Only in this case, everything will work properly and Google Analytics will understand the tracking data. Some of these variables are required and some are optional.
Here you can see some variables from Google’s official documentation page for setting up a standard e-commerce tracking data layer for the Universal Analytics tag in GTM (the key GTM tag to push e-commerce transaction data to GA).
3) Configuring GTM to send transaction data to GA
After the developers have set up the data layer, they will need to configure Google Tag Manager to understand when there is a successful transaction and transfer the data over to Google Analytics. This can be done via creating a Google Analytics transaction tag in GTM and a trigger that will activate this tag when particular parameters are met.
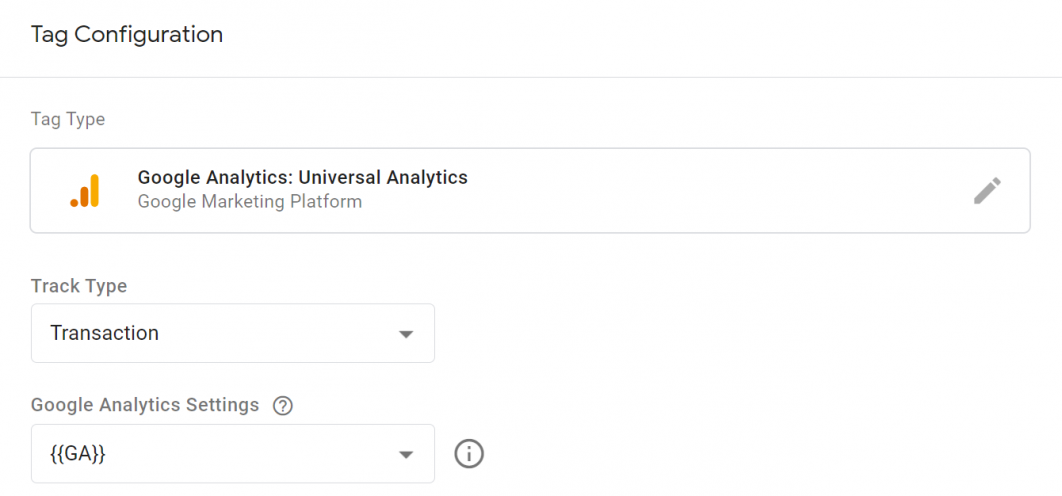
The tag is created in your GTM account by clicking Tags > Add New. Under tag type, choose Google Analytics: Universal Analytics.
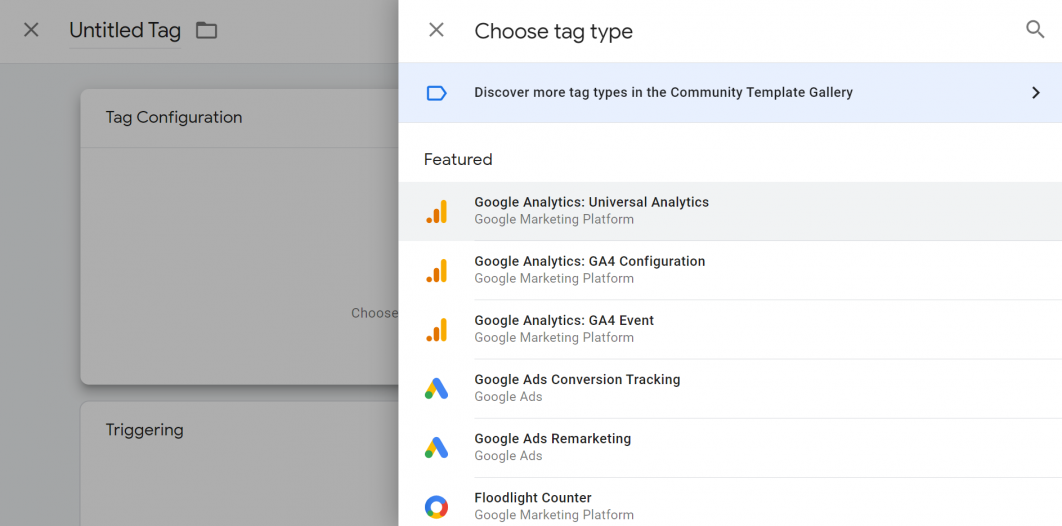
In the “Track Type” field, you will choose “Transaction.” In the GA Settings, you will need to choose the Google Analytics Settings variable or just type your GA tracking ID. Then give your tag a descriptive name.
The next step is to create a trigger for the tag. The trigger configuration may depend on your tracking scenario. A common solution is to create a trigger of the Page View trigger type that will fire on a specific page proving a successful transaction (like the order confirmation page). The order confirmation page needs to have the data layer placed above the GTM container. Make sure it has a specific URL that distinguishes it from the others and place its URL in the trigger. In this way, GTM will know it needs to fire the Google Analytics tag after a successful transaction.
Then open the preview and debug mode in GTM and make a test transaction. If everything is fine, you can publish the Google Tag Manager container.
Let us help you set up your e-commerce tracking
There are lots of scenarios that can be implemented for e-commerce tracking with Google Tag Manager and Google Analytics. You can entrust this setup to professional developers and be sure everything is done in accordance with the best GTM and GA practices, as well as with your e-commerce website’s specifics.
In a world where data is invaluable, accurate transaction tracking will help you make more informed marketing decisions. Let this help your e-commerce business flourish!
Your Golems


Comments