
Slideshows and carousels are among the most exciting solutions to present visual content on websites. In this blog post, the Golems Drupal team will take a closer look at them. Our readers whose sites are built with the Drupal CMS have especially good reasons to keep reading. We will explore how to create a slideshow in Drupal using the Views Slideshow module — one of Drupal’s best slideshow building tools.
What are slideshows exactly?
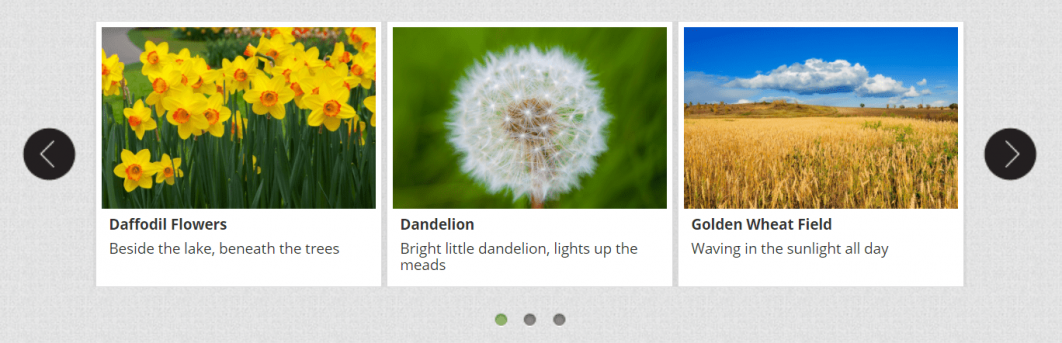
Slideshows are sets of images, videos, or other elements, usually in a prearranged sequence, that are displayed on the screen one after another. There are two options for how the elements replace each other:
- This can happen automatically at specific intervals (e.g. a few seconds). However, today, it is recommended to be careful with slideshow autoplay for accessibility reasons.
- This can be manually controlled by the viewer via the “previous/next” buttons, thumbnail navigation, or similar functionality.
How are carousels different from slideshows?
Slideshows and carousels are similar technologies, so the same tools are often used for their creation. However, there is a key difference between them. Carousels are groups of images (or other elements) that are displayed at the same time on the same screen.
Slideshows and carousels are often enriched with special effects like rotation, panoramic motion, zoom, transitions, Parallax, vertical or horizontal scrolling, and many more.
What makes slideshows and carousels popular?
Slideshows and carousels are often used on websites because they are visually appealing, engaging, and space-saving. They help you capture your user’s attention and tell a more convincing story.
Thanks to slideshows and carousels, you can showcase as much visual content as possible within a limited space on your website. It’s possible to rotate different elements instead of choosing just one, which makes slideshows and carousels an especially great choice for homepages, testimonials, portfolios, advertising banners, e-commerce products, and so on.
These technologies also offer great opportunities for analytics and A/B testing because they show which elements are the most popular with website users.
Creating a slideshow in Drupal with the Views Slideshow module
Introduction to the Drupal Views Slideshow
One of the numerous tools to create a slideshow in Drupal is the Views Slideshow module, which allows you to organize any content, not necessarily images, into a slider.
As follows from the module name, it works with the Views — the key Drupal module for putting together highly customizable content collections. As of Drupal 8, the Views is part of the Drupal core, which makes it ready out-of-the-box and easier to use. With Drupal Views, you can get a collection of any data from your website (not solely content), filter and sort it according to various parameters, including dynamic context, configure specific fields, and so much more.
Finally, the Views Slideshow module can make it all into slideshows! For every single view, the Views Slideshow in Drupal will provide individually customizable settings. You can rotate whatever Drupal elements you want in your slideshow — images, videos, news, articles, blog entries, comments, testimonials, users, hot e-commerce products, taxonomy categories, etc.
The Views Slideshow Drupal module installation
Install the Views Slideshow module on your Drupal website just like you would do with any contributed module. Here, we will be demonstrating the 8.x-4.x version of the module meant to create a slideshow in Drupal 8 and 9.
There are two modules included in the same pack: the main Views Slideshow API and the Views Slideshow Cycle submodule. In most cases, you will need both of them.

When it comes to dependencies, the Views Slideshow primarily depends on the Drupal Views. The Views module in Drupal 8 and 9 is enabled by default, so you will not need to do anything at all. However, if your site is on Drupal 7 or older, make sure the Views is installed on your website as a contributed module.
If you are using the Views Slideshow Cycle submodule, you will also need to install external JavaScript libraries in your site’s /libraries folder. For the Drupal Views Slideshow 8.x-4.x, these libraries are:
- jQuery Cycle 3.x to be put in /libraries/jquery.cycle
- JSON2 to be put in /libraries/json2
- jQuery HoverIntent to be put in /libraries/jquery.hoverIntent
- jQuery Pause to be put in /libraries/jquery.pause
Just follow their links, click the green “Code” button, download the ZIP archives, and place the folders in /libraries by renaming them as provided above.
Note: If you use the Composer package manager to install Drupal modules, it takes care of the third-party libraries automatically.
Drupal Views creation
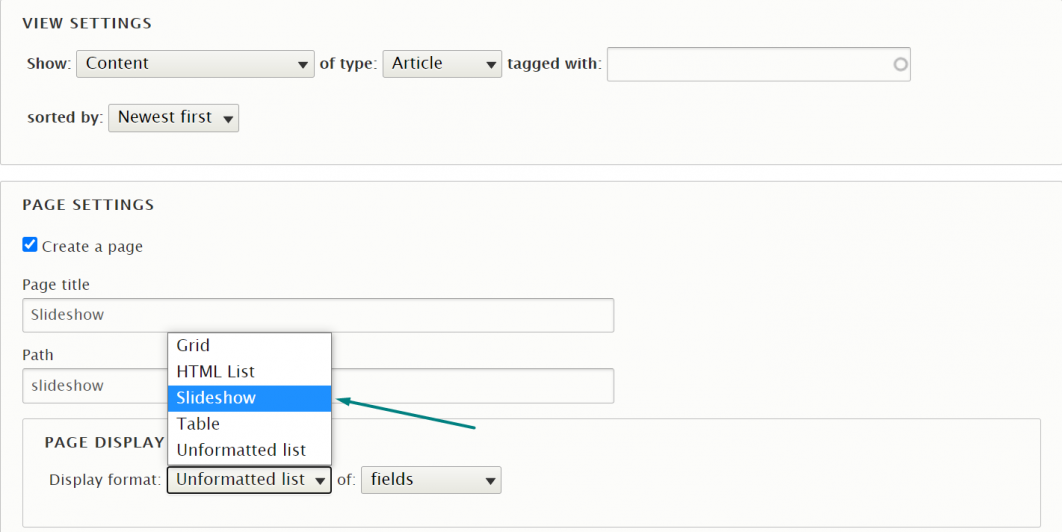
To create a slider in Drupal, you will first need to organize your content into a Drupal view just like you usually do. For example, let it be content of a specific type (article, testimonial, photo, and so on). Depending on whether you select to create your view as a page or as a block, you will have the block or page display settings, where you will need to select the special option that comes from the Views Slideshow module — “Slideshow.”
A slideshow of what content formats or elements would you like to display? You may choose fields, full posts, teasers, titles, and so on. Finally, scroll down to the bottom to save your newly created view and you will be taken to its configuration page.
Drupal Views configuration
If you have set your view as one built out of fields, you will see that it only has a title field out-of-the-box. Click “Add field” to add more fields to your view (image, description, publishing date, and so on).
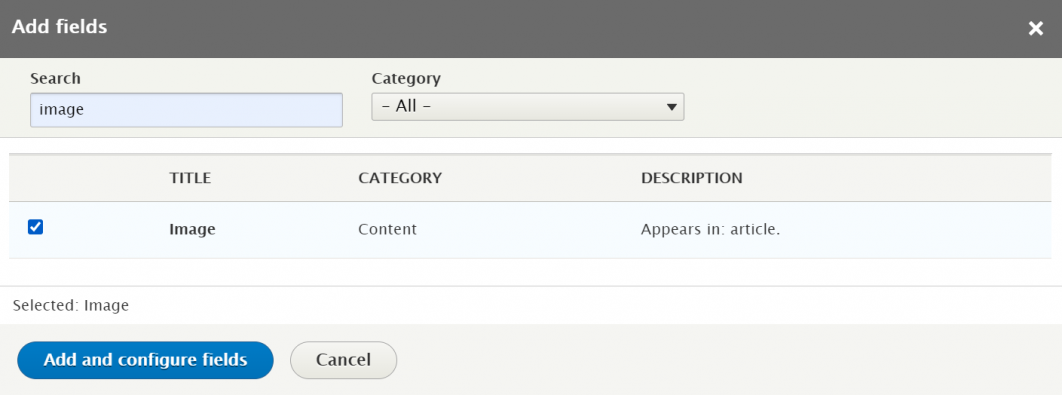
In most cases, a slideshow has images, so you will need to decide which image style your images should follow — otherwise, they may turn up being of different dimensions. This can be resolved via image styles in Drupal. While adding an image field to your Drupal view, you will be able to configure it by applying an image style to it.
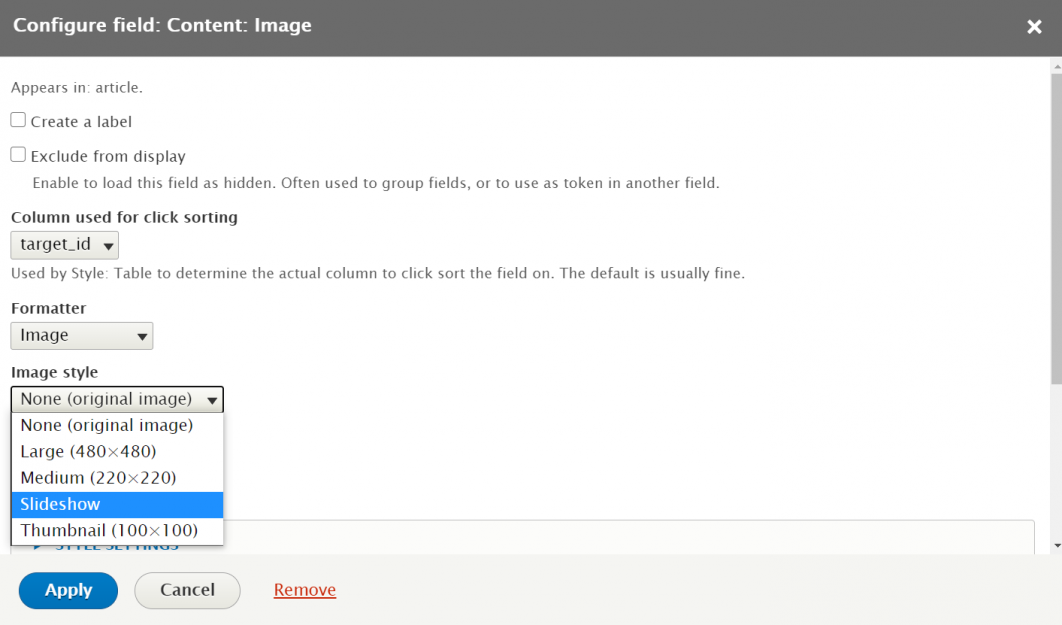
Next, we will show how to create a new image style specifically for your slideshow (or for other purposes in the future).
Slideshow image style creation
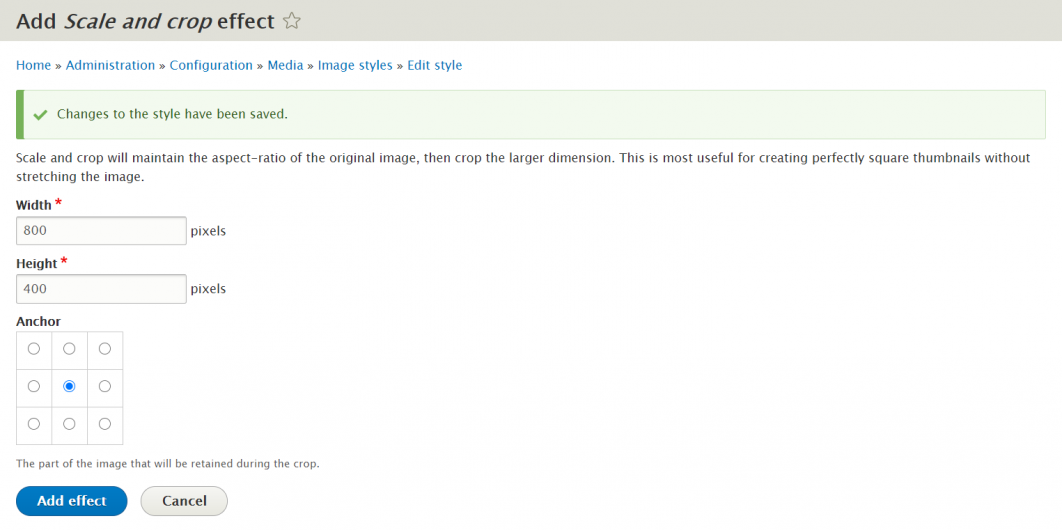
To create an image style, go to Configuration > Media > Image styles and click “Add Image style.” Give it a name and click “Create new style.”
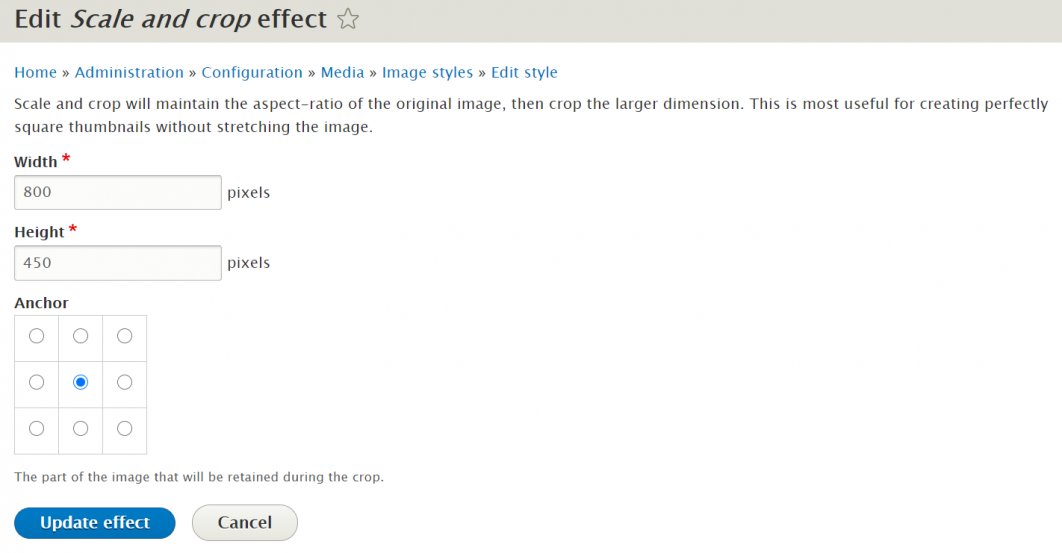
Select the effect your image style will be based on. Usually, it is “Scale and crop,” which makes all newly uploaded images resize proportionally and have their edge areas cut off. So select “Scale and crop,” click “Add,” and set the necessary image width and height. Then click “Add effect” and save the entire image style.
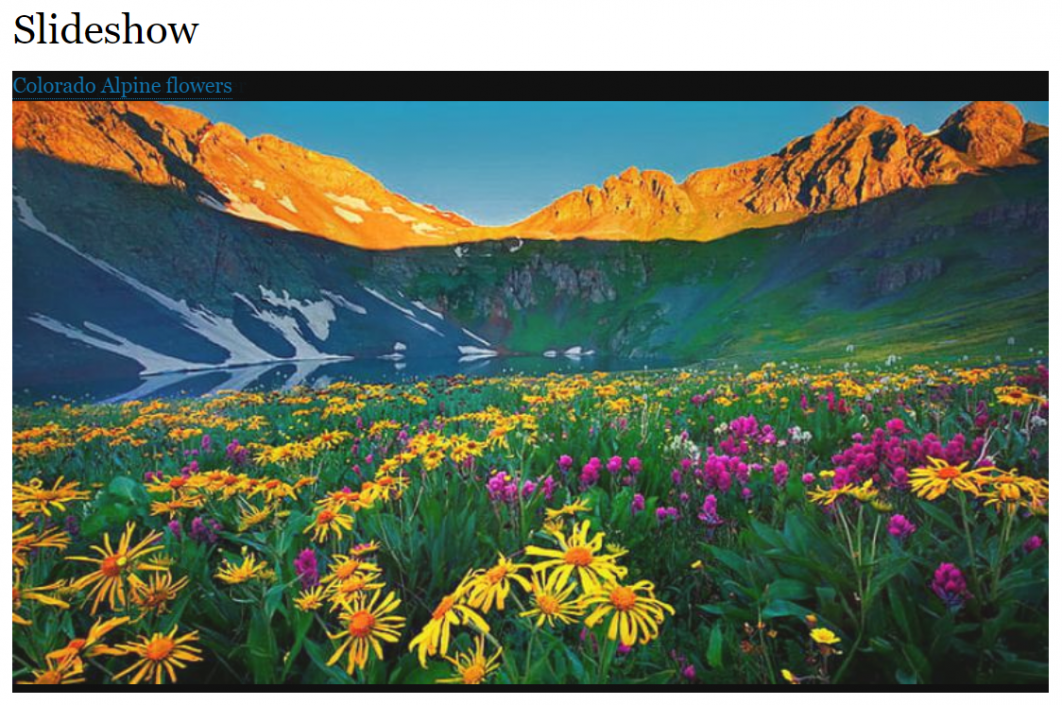
Drupal Views slideshow: checking the result
Once you have attached an image style to your Drupal view, saved all settings and the view itself, your slideshow should be working.
- If your view is a page, just follow the link and you will be able to see the result.
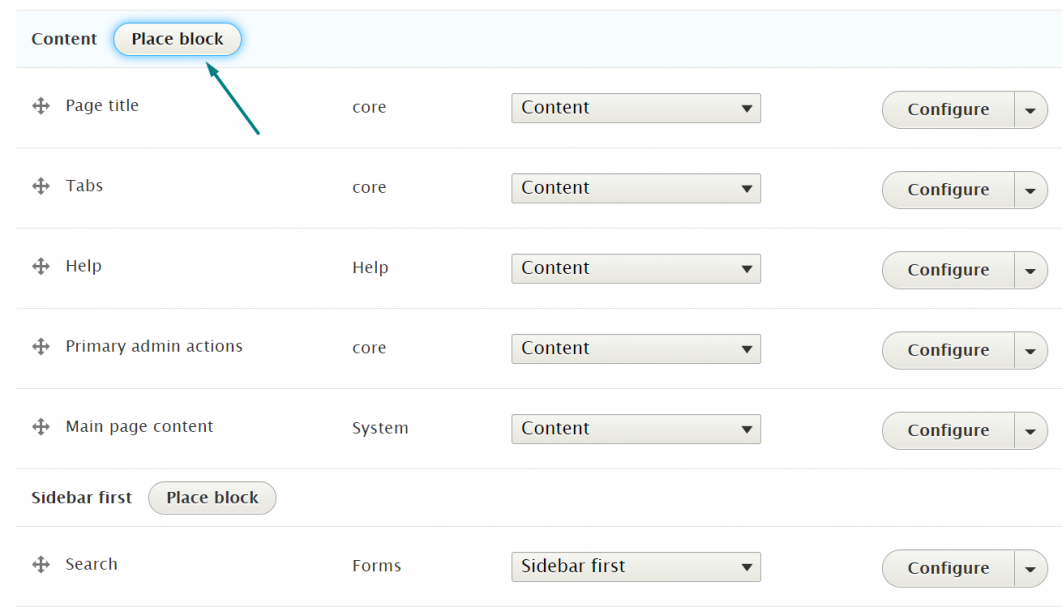
- If your view is a block, you will additionally need to place your block on your website in Structure > Block Layout. If needed, use the “Demonstrate block region” option to choose your region. Find the region to place your block (e.g. the Content region), and click “Place block” next to it. Then find your slideshow block on the list of blocks, click “Place block” again, and save the final result at the bottom of the page.
No matter if it’s a page or a block, congrats on the final result — your Views Slideshow is rotating automatically.
Let’s discuss your future Drupal slideshows
This very simple example covers just one of a million options to create a slideshow in Drupal. In addition to the Views Slideshow, there are lots of other helpful Drupal slideshow modules. Moreover, anything that cannot be achieved through a module can be coded by professionals.
Let your Drupal image sliders be little masterpieces that engage and convince your audience within a limited space on your website! What is really unlimited here is the choice of possible effects and styles that your slideshows can have as an integral part of your website’s design concept. Just share your ideas with the Golems development team and we will help with their implementation.
Ready to create the “wow” effect,
your Golems
Comments