
A website’s theme does much more than define its layout, color scheme, or typography. Through all the technical elements, a theme fulfils its true mission, which is to create your brand’s identity and make your website a visually attractive and user-friendly place — the place your customers will love!
When it comes to website themes, Drupal 9 offers very flexible options. You can choose between using a core Drupal theme, installing a contributed one, or creating a Drupal 9 theme for your website based on specific requirements. The third option is the top choice for many websites because it allows developers to have no limits in customization. That’s why, the Golems team would like to share a guide to creating a Drupal 9 theme.
Drupal 9 theme development vs Drupal 8 theme development
One of the common questions is how creating a theme in Drupal 9 is different from creating one in Drupal 8. The great news is that the difference is not significant. It’s all about specifying the core_version_requirement as ^9. The core versioning was introduced in Drupal 8.7.7 and allowed developers to specify their project’s compatibility with multiple Drupal versions. It was called a great achievement by the Drupal core product manager Gábor Hojtsy.
In everything else, Drupal 9 and Drupal 8 theming processes are similar and are much more efficient and convenient than D7 theming thanks to the Twig template engine adopted in Drupal 8. However, Twig is even better in D9 because its updated version is used — Twig 2. Updated dependencies are among the good reasons for your upgrade to Drupal 9 (you can view our blog post to check what’s new in D9 and how to prepare and do your upgrade). Anyway, let’s now move on to the actual Drupal 9 theme development tutorial.
How to build a Drupal 9 theme: step-by-step guide
The steps for creating a theme in Drupal 9 resemble ones for creating a module, with just a few of theme-specific differences. The most important part of creating a theme is defining it in the your-theme-name.info.yml file, which will contain its metadata, libraries, block regions, and other details.
1. Creating the name
Your theme will need a name, both a human-readable one and its machine version (the one to use in the names of folders, files, and so on).
When thinking of a name, remember it must be unique and cannot repeat the name of an existing theme, module, distribution, or technical term already used for Drupal folders (e.g. lib, vendor, templates, drupal, css, js and others).
Also, make sure the machine name uses the lower case, contains Latin letters or numbers, starts with a letter, uses underscores if needed, and avoids spaces. Please keep the name within 50 characters, which is more than enough even for the most vivid imagination. For example, we could name our theme “Golems theme” and its machine name would be “golems-theme.”
2. Creating the theme’s folder
The next step is creating a folder named with your theme’s machine name in your site’s /themes/ folder. According to the best practices, individually created themes are placed into the /themes/custom/ subdirectory.
3. Creating the info.yml file
At the root of your theme’s folder, create its main file — which is also the only required one — the info.yml file. Just like the theme’s folder is named with the theme’s machine name, so is the info file. In our example, the theme’s yml file would be named golems-theme.info.yml.
The info.yml file includes parameters, or key-value pairs, some of which are required and some are optional. With at least the required ones defined, your theme should already be available on the Appearance page of your Drupal’s admin dashboard.
Main parameters of the info.yml file
- Name* (required) is the human-readable name of your theme.
- Type* (required) is the type of the extension (“theme”).
- Description (optional) is a brief description that will be visible in the Drupal UI.
- Dependencies (optional) is a list of modules your theme depends on. An example would be drupal:views. You can also restrict the dependencies to specific module versions.
- Package (optional) defines in which category your theme will be displayed in the Drupal UI. By default, it will be “custom.” It is recommended to not define it manually because this might create confusion if you add your theme to drupal.org where this value will be added automatically.
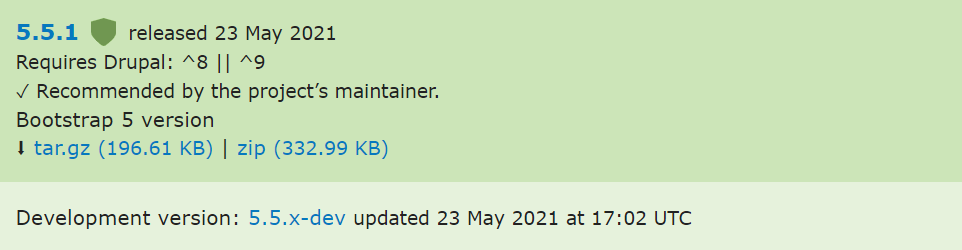
- Core_version_requirement* (required) specifies the Drupal versions your theme is compatible with. Example: core_version_requirement: ^8 || ^9. You can also narrow this down to specific versions.
- PHP (optional) specifies the minimum PHP version required. Example: php: 7.2.
- Version (optional) specifies the theme’s version. Example: version: 9.x-1.0. Similar to the Package, it is recommended to not define the Version value manually to avoid confusion if you add the project to drupal.org.
- Libraries (optional) lists of CSS/JS libraries needed by all website’s pages where the theme is active.
libraries:
- theme-name/library-name
See more details about the libraries in the “Adding CSS and JavaScript to the theme” part of this blog post. - Libraries-override (optional) allows you to override specific libraries.
- Libraries-extend (optional) allows you to define which libraries to add when a specific library is in use.
- Base theme (required in Drupal 9) allows you to decide whether you want to create an entirely new theme or a subtheme of an existing one that will inherit its resources. For an entirely new one, you can set the “Base theme” value to “false.” For a subtheme, specify a parent theme for it (for example, “classy” or “stable”).
base theme: classy - Hidden (optional) allows you to show or hide the theme in Drupal admin U. Sometimes, you want to hide it — for example, if you are just building it for testing purposes. Use “hidden: false” to show it and “hidden: true” to hide it.
- Engine (optional) is the parameters that shows the template engine used. By default, it’s Twig.
- Logo (optional) defines the path to where your theme’s logo is stored. By default, Drupal will search for the file named logo.svg in your theme’s folder, but you can change this.
- Screenshot (optional) defines the path to where your theme’s screenshot is stored. By default, Drupal will search for the file named "screenshot.png" in your theme’s folder, but you can change this.
- Regions (optional) lists the theme’s regions. They are listed as key-value pairs where the key is a region’s machine name and the value is a human-readable version.
regions:
content: ‘Content’
footer_menu: ‘Footer menu’
Defining at least one region will disable the default ones and you will be fully responsible for all the regions. See more details about this in the “Enabling the theme’s regions in Twig” part of this blog post.
- Regions_hidden (optional) allows you to remove some of the inherited regions.
regions_hidden:
- site_branding
- Features (optional) lists the settings available in the theme.
features:
- node_user_picture
- comment_user_verification
- comment_user_picture
- Ckeditor_stylesheets (optional) lists the CSS files to be added to the CKEditor frame.
ckeditor_stylesheets:
- css/style.css
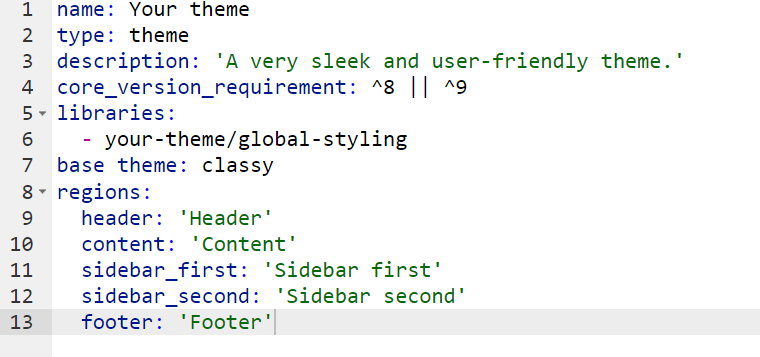
Here is how an info.yml file example may look:
4. Listing the regions in Twig
If you have defined any regions in the info.yml file, you will also need to add regions to your theme in the page.html.twig file. The exact path to this file is core/modules/system/templates/page.html.twig. All regions need to be listed as Twig variables where, for example, content: ‘Content’ becomes {{ page.content }}. You can also add HTML markup to the regions in this Twig file.
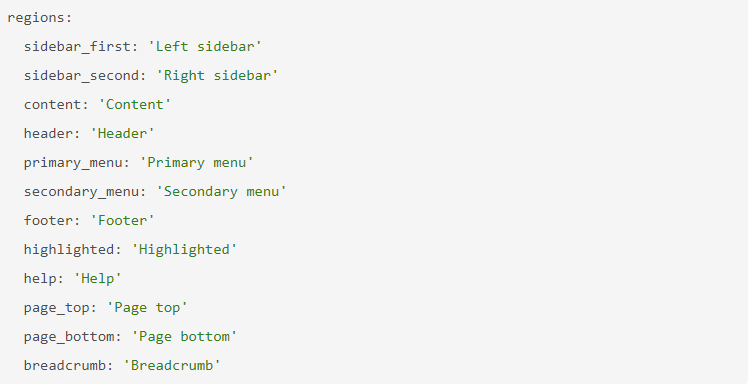
There are default regions, so if you do not declare any new regions in the info.yml file, Drupal will assume you want to use the default ones.
5. Adding CSS and JavaScript
To add the stylesheets and JavaScript, you will need to create the theme-name.libraries.yml file at the root directory of the theme. You will also need to create the CSS and JS directories containing the corresponding files — styles.css and script.js. Then list all your CSS and JS assets in the libraries.yml file. Finally, it is necessary to declare the libraries in the info.yml.file.
To load your styles on all the pages, it is a common practice to use the global-styling library. So you can list the global-styling library in the libraries.yml file:
global-styling:
css:
theme:
css/style.css: {}
css/print.css: {}
js:
js/script.js: {}
And then define it in the libraries parameter of the info.yml file:
libraries:
- theme_name/global-styling
With everything ready, you can clear the cache and activate the new theme in the admin dashboard.
To sum up
Hopefully, our Drupal 9 theme development tutorial has been useful to you. Drupal theming offers endless opportunities in creating a theme that is easy-to-use on all devices, accessible to all audiences, and visually appealing. Try this with the Golems team!
Comments