
Getting deep insights into your website’s traffic and customers’ behavior is priceless. However, this can be available to anyone for free with Google Analytics. All you need is to install the tool and dive into its valuable statistics.
Today, we will show how the Drupal Google Analytics module can help you easily set up GA on your Drupal website. Let our tour of Drupal Google Analytics for Drupal begin!
Getting acquainted with Google Analytics
Google Analytics is definitely the favorite service of most SEO specialists and marketing managers. It is also very much appreciated by business owners, developers, website admins, and everyone who knows the worth of good web analytics.

Google Analytics allows you to get a deeper understanding of your customers so you can evaluate and optimize your marketing campaigns, content strategy, products or services, and so on. To analyze the behavior of your site and app users, Google harnesses the capabilities of machine learning.
With GA, you discover in every detail where your users come to you from, what their journey through your website is, which pages they love and hate, what keywords they use to find you, what your typical customer’s “portrait” is, and so much more.
In addition to getting the data, you can share it in handy ways through detailed GA reports. Google Analytics also integrates with other Google solutions such as Google Ads, AdSense, Search Console, etc.
The Google Analytics service is free in its basic version. There is also a paid version called Google Analytics 360 that is recommended for large businesses. It has additional integrations (Ad Manager, Display & Video 360, Search Ads 360, Campaign Manager 360, Google BigQuery, Salesforce Marketing Cloud, etc.), as well as more advanced analysis opportunities.
GA + Drupal: the Drupal Google Analytics module
The Google Analytics Drupal module is currently 14th among 46,000+ contributed modules on drupal.org. This is not surprising because the module easily integrates the Google Analytics statistics with your Drupal website.
All you need is to register with Google Analytics and get the ID — and the Drupal module will do the rest of the integration work. It frees you from the necessity to paste Google Analytics ID into the HTML code of all your pages as it provides a handy box in the user interface for doing that. You will only paste the ID once using the Drupal admin dashboard.
This makes the Drupal Google Analytics module a very user-friendly solution for non-technical users, which is often the case with SEO and marketing specialists. With the ID added, you will immediately find the GA settings available to you on your Drupal website’s admin dashboard.
The Google Analytics module has versions to be installed on Drupal 7, Drupal 8, and Drupal 9 websites. Let’s now see it in action.
Guide to using the Google Analytics module for Drupal
1. Getting the Google Analytics ID
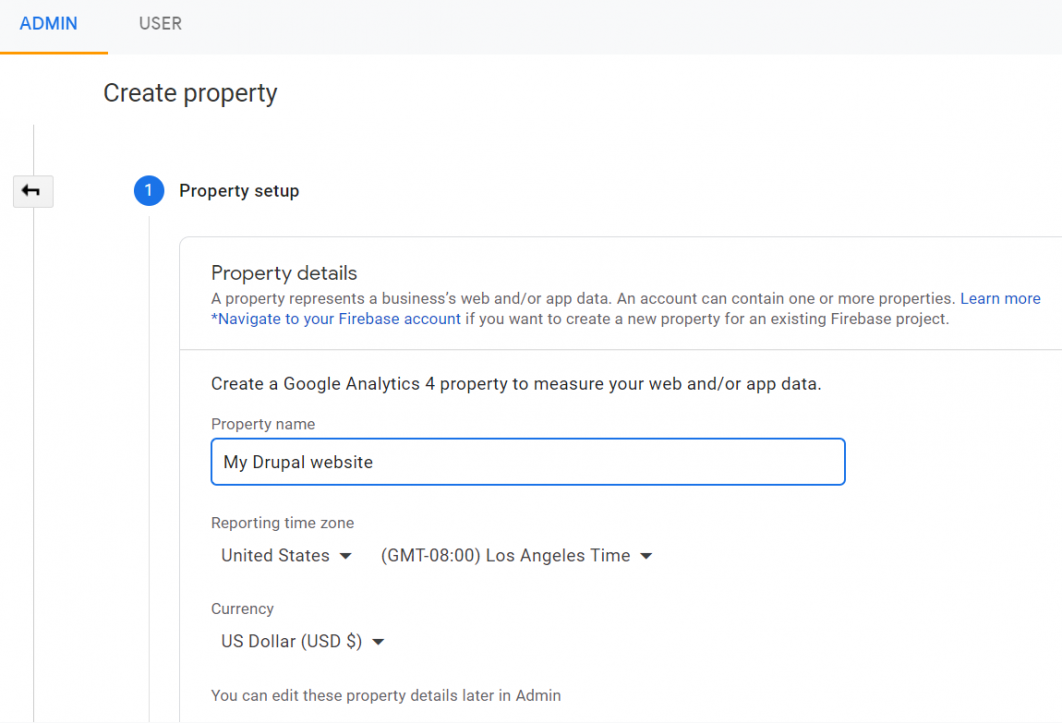
First of all, you will need the tracking ID that will set the GA wheels in motion. Go to the Google Analytics website (you will need to log in with your Google account or create one first). Open the “Admin” tab and click “Create Property.” The property will be your Drupal website. Fill out just a few required details about it and check the boxes about agreeing with Google’s terms of service.
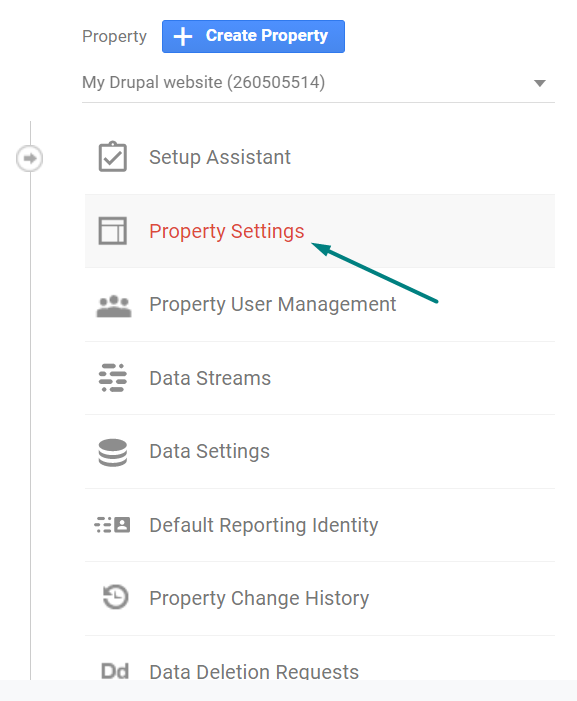
Once you’ve completed your registration, go to the Property Settings page and copy your Property ID.
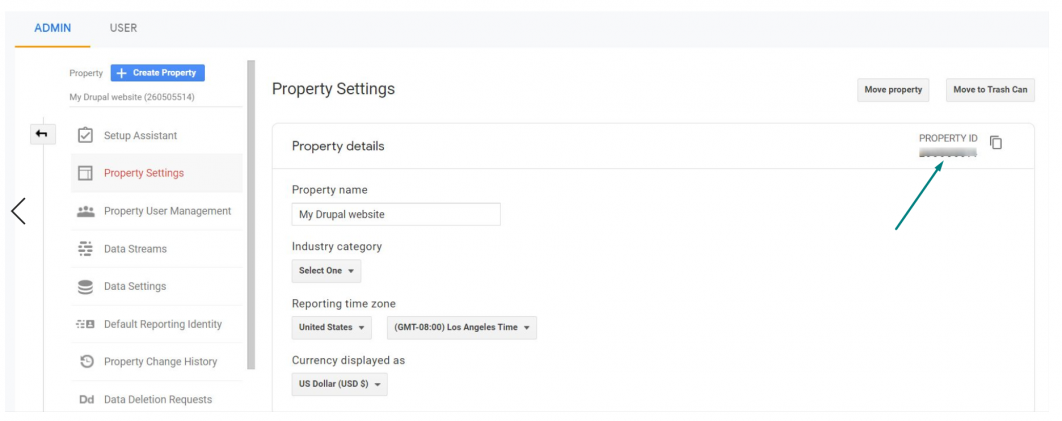
In case you already have your website registered with GA, you can skip the previously described steps. Just go to the “Admin” tab at GA, find your property, and click on the Property Settings to copy the ID. Save the ID and let’s move on to the Drupal part.
2. Drupal module installation and basic setup
Next, you will need to download the Google Analytics module and enable it on your Drupal website. We are using the Drupal 8 Google Analytics module (8.x-3.1 version) in our example, so we will demonstrate how to add Google Analytics to Drupal 8.

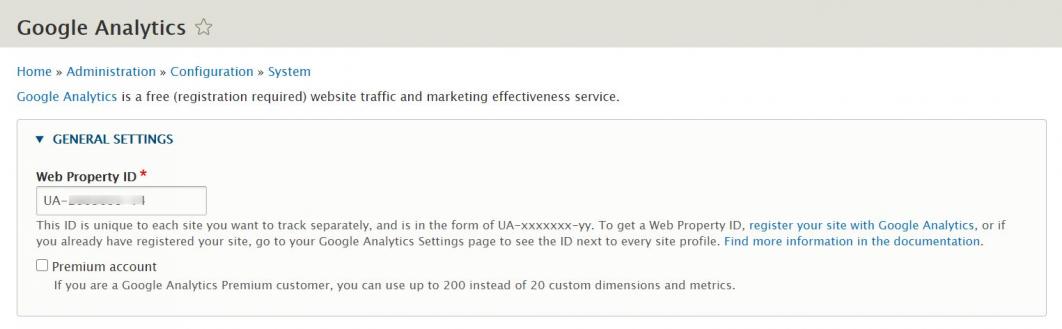
After enabling the module, you will need to click “Configure” right away to open the module’s settings. Another way is to go to Configuration > System and select Google Analytics.
Under “General Settings,” paste the Property ID that you have just copied from GA into the “Web Property ID” box. Please follow the ID entry format specified by your Drupal admin dashboard. This means you may need to enter the ID after the prefix and also put a dash between the digits. Save the configuration.
3. Using the module’s key settings
In addition to just submitting the Property ID, there are lots of exciting things to configure on the Google Analytics configuration page. You can skip this because the defaults are sensible for most websites. However, knowing the settings is important. Let’s start with the “Tracking scope” list of settings.
- Single or multiple domains
You can use Google Analytics if you have a single domain (e.g. website.com), multiple subdomains within one domain (e.g., website.com, shop.com, etc.), or even multiple top-level domains (e.g. website.com, website.org, etc). The default configuration is for a single domain so be sure to change it if you are using a different setup.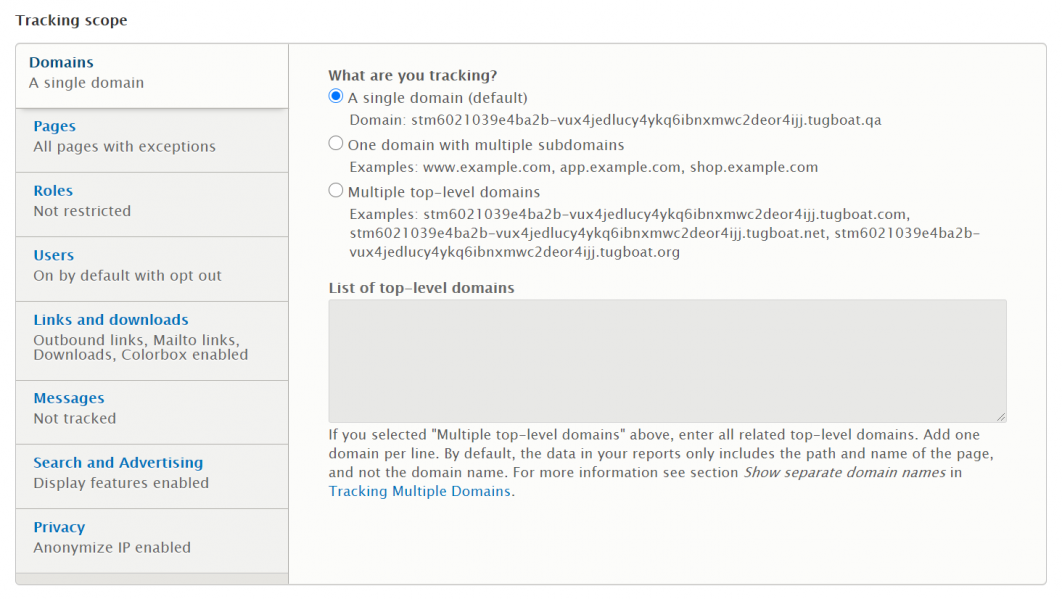
- Page tracking
You can decide which pages should or should not include the GA tracking codes. Use one of the two modes — either list the pages that you want to exclude from tracking or the ones you want to include.
- Role tracking
The next setting is about user roles that you may want to track. For example, the actions that website admins do on your website might not be important for getting the whole picture of your users’ behavior, so you can exclude them from tracking. Similar to the previous setting, you can use the excluding or including mode.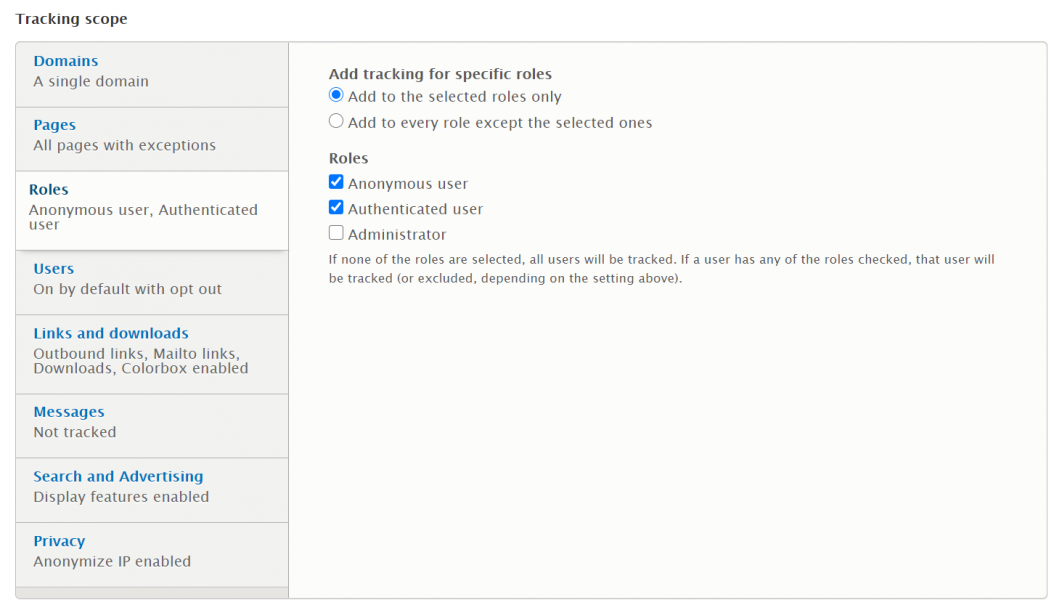
- User tracking
You can allow your users to decide whether or not they want to be GA-tracked. The best-looking option is the 2nd one, which tracks users by default but allows them to opt out of this in case they have the “Opt-in or out of tracking” permission. Alternatively, you can select the 3d option that works the other way round. Finally, there is an option with tracking user’s Drupal ID across devices, but you should be careful with that for the sake of privacy and GDPR compliance.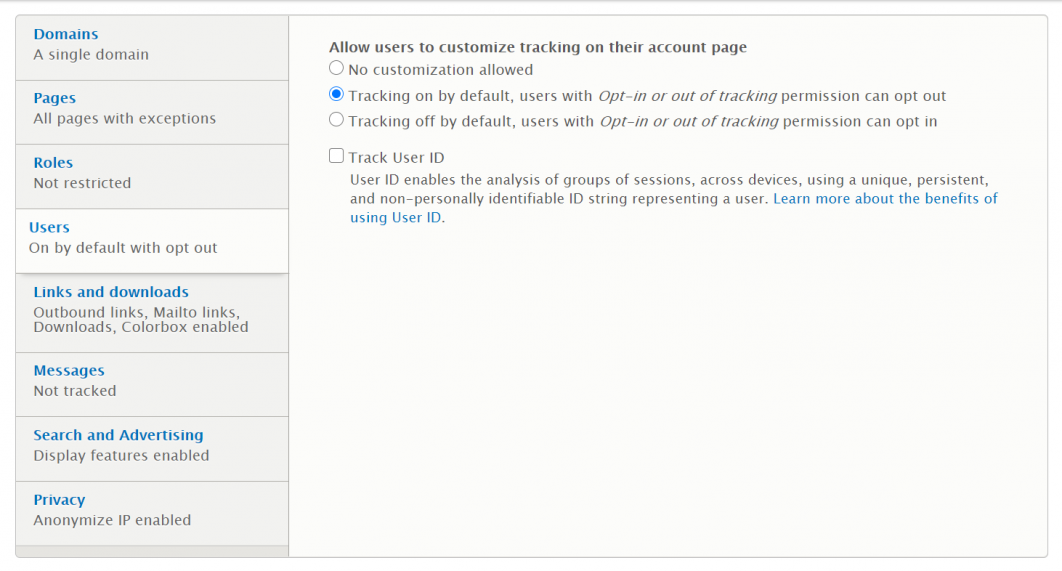
- Link and download tracking
GA will allow you to track the number of clicks on your website links and downloadable files. You can select the link types and file extensions to track. The default configuration has tracking enabled for inbound links, outbound links, and file links of quite a number of extensions.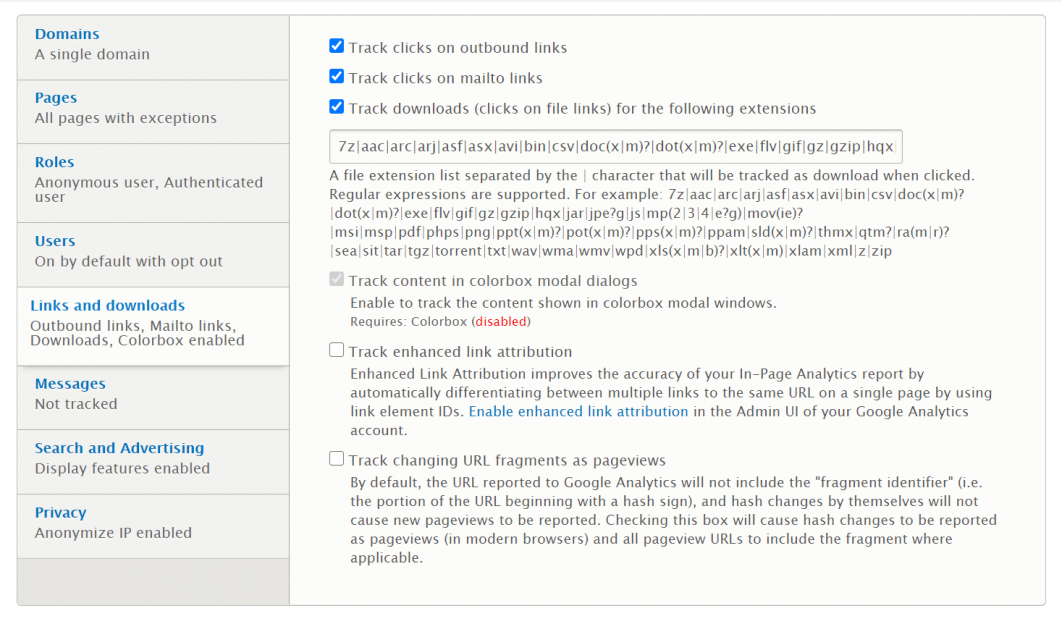
- Message tracking
By tracking the status, warning, and error messages that your users are getting, you can analyze your website’s usability. Since every message is a separate event, you can also track conversions — for example, by tracking messages about the successfully submitted subscriptions or placed orders.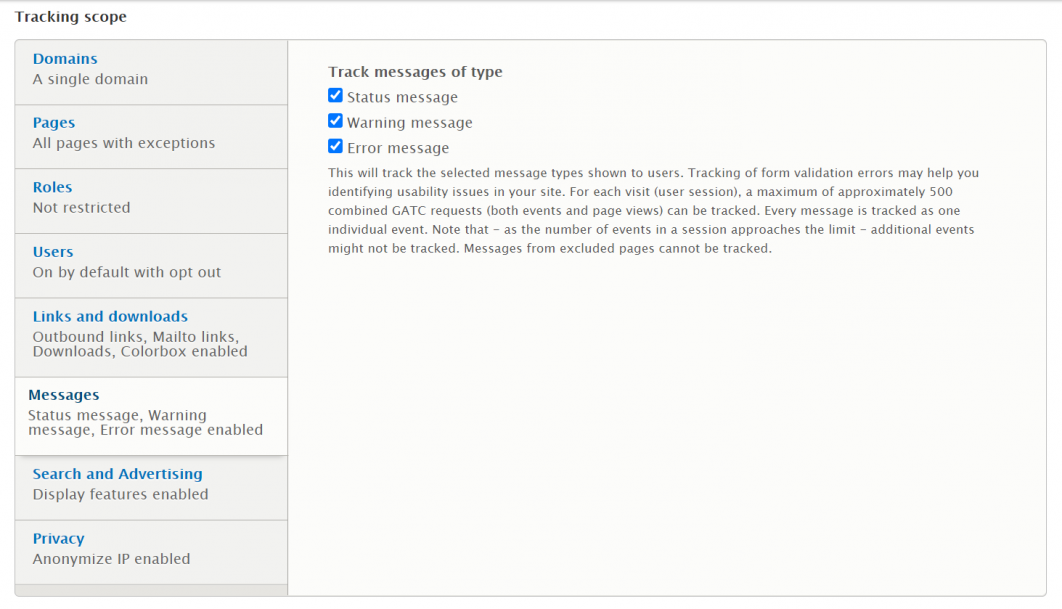
- Search and ad tracking
The next setting allows you to enable the tracking of your internal search keywords, integrate with AdSense ads, and track more advanced Display Advertising Features such as remarketing, demographics, and interest reporting. However, tracking advertising features needs a careful approach because it may conflict with GDPR legislation.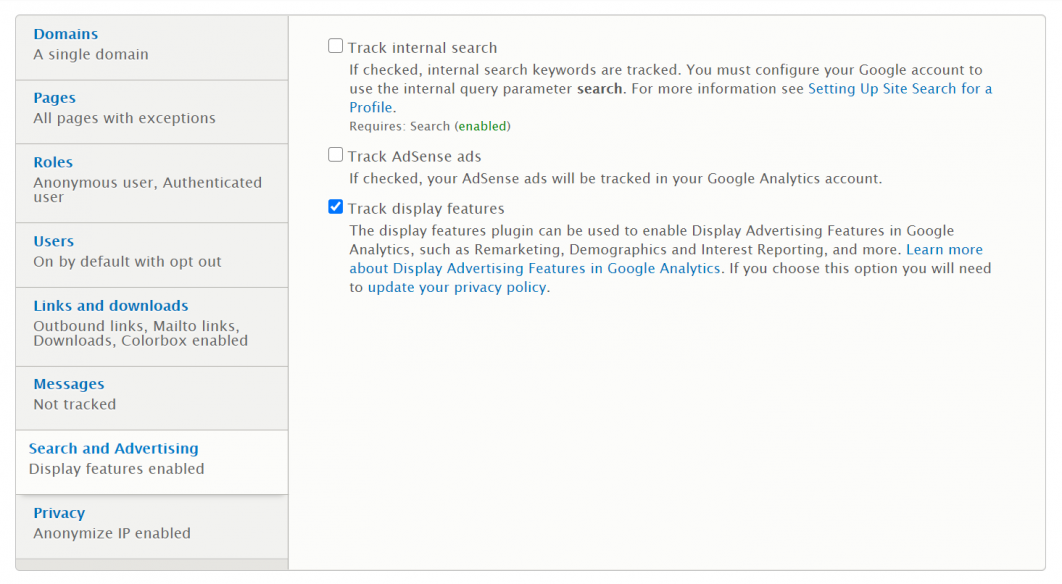
- IP address anonymizing
Enabling the next option is recommended for privacy reasons, although it might slightly influence the accuracy of the geographical data you receive. Google may remove the last part of a user’s IP address before storing it.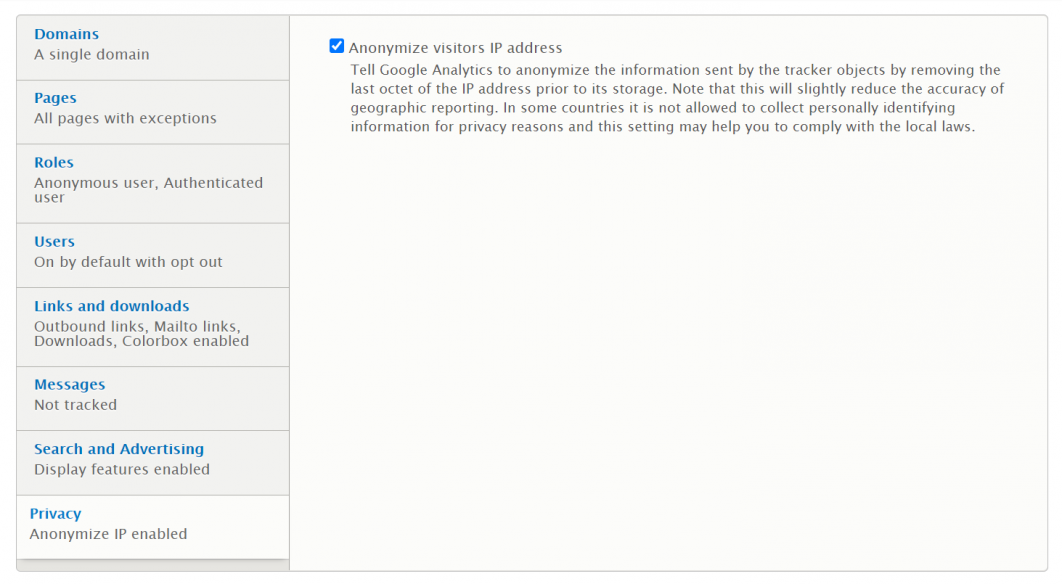
- Customised dimensions and metrics
The next level of complexity is setting your custom dimensions and metrics in addition to the ones that are tracked by default. This allows you to track specific scenarios in your website’s work. For example, you will be able to track the performance of promoted content, the difference between logged in and logged out users, the popularity of content by specific authors, and so on. You can specify the dimensions and metrics names on your Drupal module’s configuration page, but you must have already configured them in your GA interface. The use of tokens is allowed.
- Advanced settings
Finally, there are some advanced settings for especially tech-savvy administrators. They include locally cache tracking code file, adding custom JavaScript code snippets, enabling the GA debugging, and more.

When you have completed your configuration, don’t forget to click “Save” at the bottom of the page. It may take Google up to 24 hours to activate your tracking. After that, you can dive into the exciting stats in your Google Analytics interface.
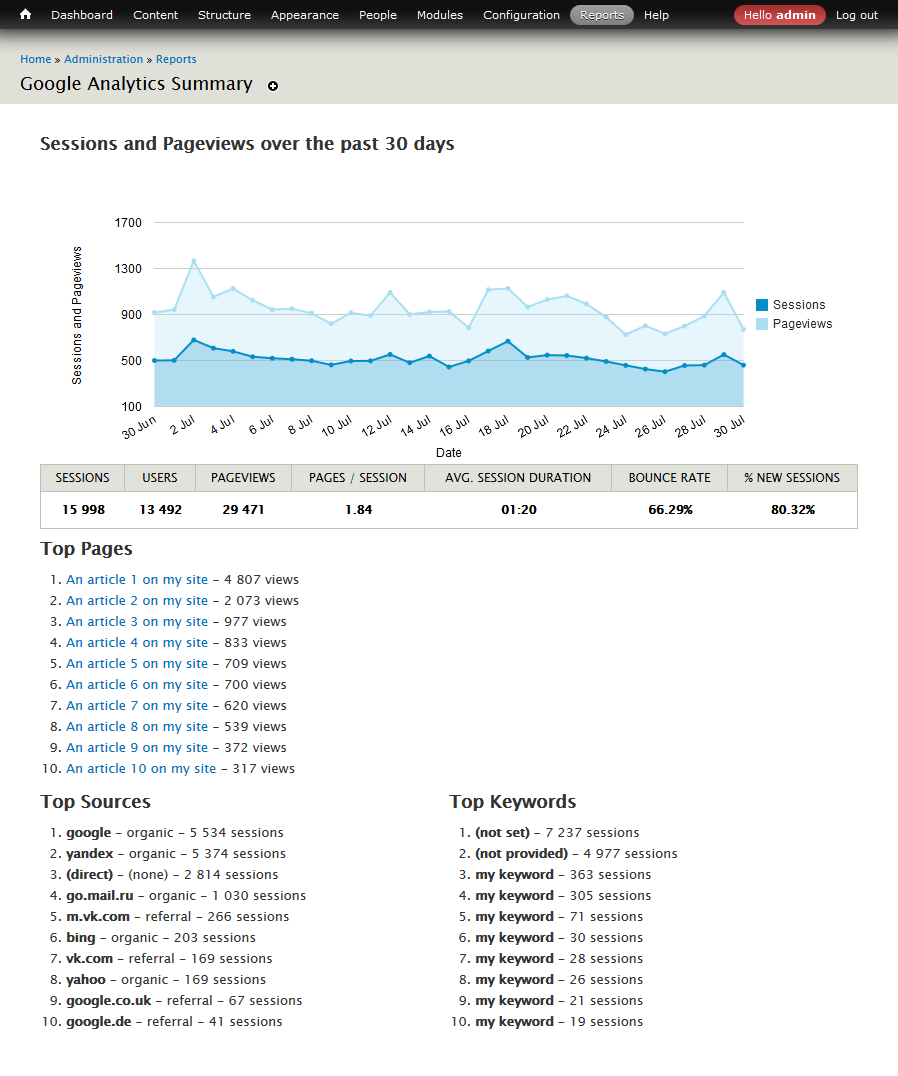
When speaking about tracking the GA results, we should mention another interesting module — Drupal Google Analytics Reports. It presents your tracking data in the form of graphical reporting. With this Drupal module, you will be able to create a Google Analytics dashboard with the key metrics inside your Drupal site.
Ask Google to share its valuable insights with you!
The famous search giant is kind enough to equip your website with all the tools that help it succeed in the World Wide Web. Just use what Google offers and combine it with Drupal’s solutions for your website. Whenever you need help with setting up Google Analytics for Drupal, feel free to reach out to our development team!

Comments